
Fort Phil Kearny (shown above in this 1867 drawing) was established in 1866 by Col. Henry B. Carrington. Named for the Civil War general killed at Chantilly, it was only in use for two years before being abandoned in 1868. Wargamer and dioramist Steve Miller has been providing an illustrated narrative of the miniature Battle for Fort Phil Kearny. Click the following links to read Part 1, Part 2, and Part 3.
Here is Part 4 of the series…
Scene 7

Here the crew of the just-arrived mountain howitzer has loaded with double canister and fires into the wave of warriors crossing the QMY. The resulting carnage is tremendous. The few remaining warriors at the front edge of the wave hesitates, then turns back on itself. Meanwhile several braves are attempting to knock down or cut down the timbers holding up the roof of the jackal-style mule stable along the east side of the stable, upon which a dozen or more soldiers and civilian are now using as a platform to fire down on the warriors in the QMY. These timbers are well set however, and resist all attempts to down them, at least for the moment.

While the hatchets bite into the timbers, troops now lining the east side of the main stockade pour down a deadly fire on those warriors. Army loses mount, and more wounded arrive at the post hospital. Surgeon Hines orders a make-shift ward set up outside that building as it is now filled to capacity and starts to work on the wounded there while the other two surgeons continue working on those inside the hospital.
Scene 8
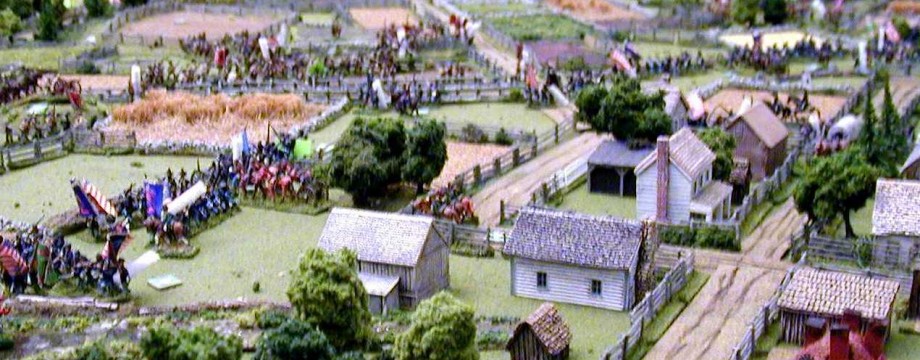
While the battle hangs in the balance, just now(about 1230) a detail arrives on the slopes of the hills northeast of the fort. This detail primarily consists of 64 men of Company C, 2nd U.S. Cavalry with Lt Horatio S. Bingham commanding. This company is one of two that has long been promised to Col Carrington and now, at long last, it has arrived. Accompanying this cavalry troop are two 18th Infantry captains on their way to their new assignments at Fort Phil Kearny, William J. Fetterman and James Powell; likewise Paymaster Major Henry Almstedt arrived with this column. The column had camped the night before on Crazy Woman Creek, some 40 miles southeast of the fort and would be arriving about noon of 4th, according to Red Cloud’s scouts. However, Captain Fetterman was extremely anxious to rejoin his regiment, and ordered camp broken at 0200 hours in order to arrive on the 3rd. As the roughly 70 men of this detail arrive on the crest of the hill a mile northeast of the fort, Capts. Fetterman and Powell survey the scene through their binoculars. They face a choice of turning back south and attempting to reach Fort Reno, 70 miles away, staying put (hopefully out of sight of the Sioux) and awaiting the outcome of the battle, or trying to approach the fort as close as possible without being seen, and once seen, charging forward at as rapid a gait as possible, with the two wagons and Major Almstedt’s ambulance in tow. Whatever his faults, Fetterman, the senior captain, is a fighter and sees his duty as being to join his command. With that, the decision is made and the column moves forward at a walk to conserve the horses for as long as possible. When still a half mile from the fort, their presence is discovered, and Fetterman orders to column to the trot, then gallop, and finally orders the “Charge” sounded by both company trumpeters.

Within two minutes the column is approaching the main gate when Capt. Fetterman notices that the QM gate is open, and gestures for the column to make for that gate instead. It is here, just outside the fort’s QM gate that Fetterman, Powell and Company C collide with Red Cloud’s forces.

Scene 9
In the intense melee that ensues, Company C suffers severe loses including it’s commander, Lt Bingham who fall just outside the gate and is killed and mutilated before anyone can help.

Five other troopers are killed before reaching the gate while several others sustain wounds of various severity, but succeed in maintaining their saddle.

The paymaster ambulance rolls up to the gate as the Indians and cavalrymen continue to battle.
Scene 10
Once inside the QM gate, Company C finds itself “sandwiched” between the Sioux already inside the QM gate and those still outside. One platoon turns and opens fire on those outside while the remainder join in the intense fighting going on within.

This enables two of the civilians that had been firing from within the teamster quarters next to this gate to rush out and push the gates closed and replace the bar holding the two panels closed. At this point the Sioux within the QM Yard are trapped and must now try to fight their way out. In the intense fighting that follows, Lt John J Adair, twice severely wounded in the Civil War is hit again; this time with a wound that will prove mortal within 72 hours. He had already submitted his resignation from the army and it had been approved. His resignation was to have been effective upon his departure with the next mail detail to Fort Reno.
- Part 1: click here
- Part 2: click here
- Part 3: click here
- Part 4: click here
- Part 5: click here
- Part 6: click here

Pingback: The Battle for Fort Phil Kearny: Part 6 | CHARGE! Civil War wargaming
Pingback: The Battle for Fort Phil Kearny: Part 5 | CHARGE! Civil War wargaming
Pingback: The Battle for Fort Phil Kearny: Part 3 | CHARGE! Civil War wargaming
Pingback: The Battle for Fort Phil Kearny: Part 1 | CHARGE! Civil War wargaming
Pingback: The Battle for Fort Phil Kearny: Part 2 | CHARGE! Civil War wargaming